

Appearance
Creating Appointments
Prerequisites
Before creating appointments, you first need to set up your calendar. Read the quick start guide for help.
Working with your calendar
Select a calendar from the calendar list screen in the main menu.
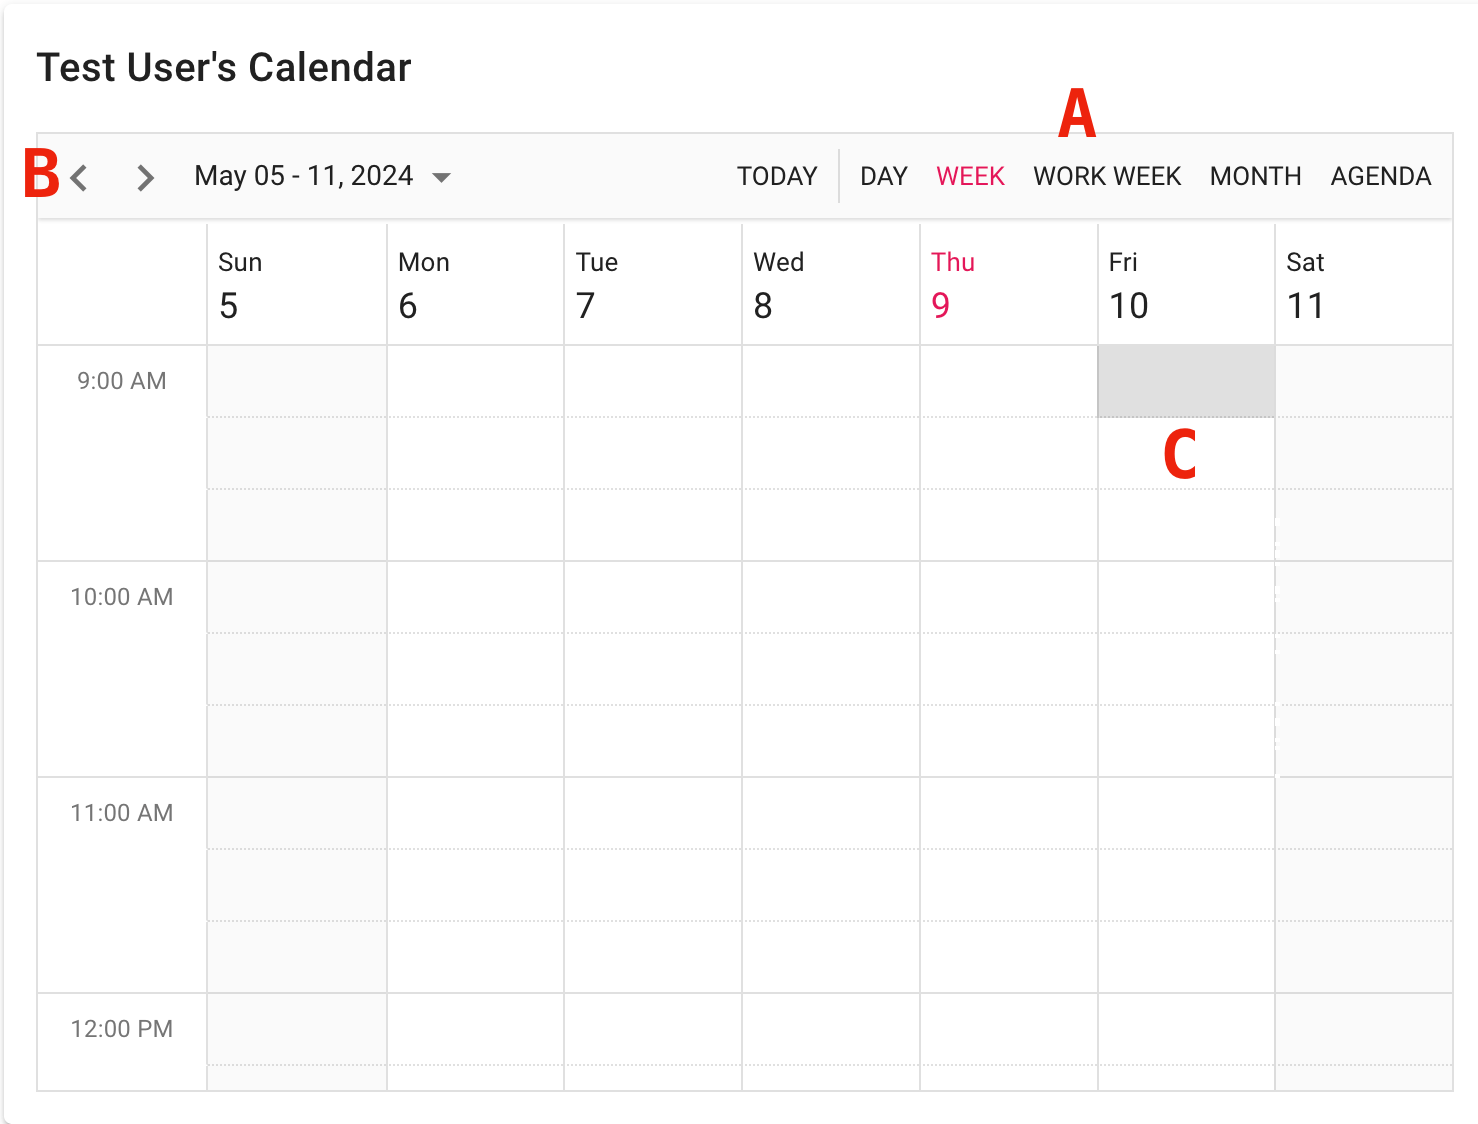
- Change the view between single days, weeks (with or without weekends) or months.
- Use these arrows to move between days/weeks/months, or the dropdown menu to jump through time.
- The day is split into slots. Double click a slot to create or edit an appointment.
Creating a new appointment
To create a new appointment, double click an empty slot in the future. You cannot create an appointment in the past - past slots are greyed out, and clicking one shows a message explaining this. The new appointments window opens:
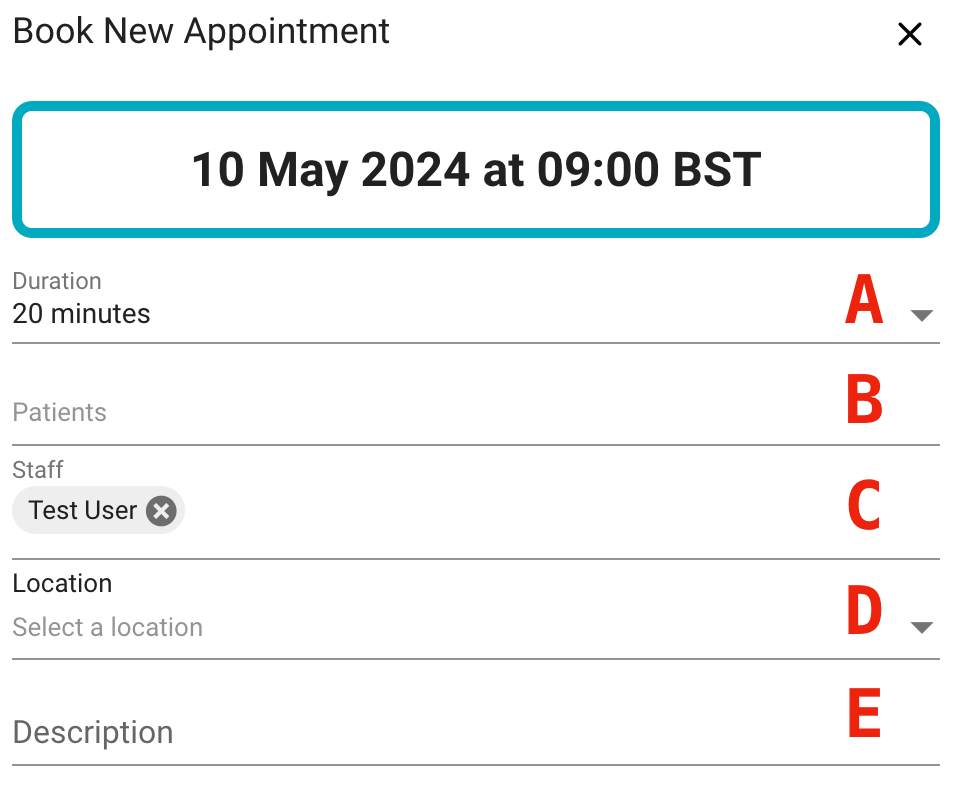
- Select an appointment duration. See the getting started guide for further information.
- Select a patient (see below).
- Select which users to assign to the appointment.
- Pick a location to hold the appointment in.
- Provide an optional description to accompany the appointment.
Selecting a patient: type either the ID number of the patient, or their full first or last name. Select the patient when they appear in the dropdown menu.
Selecting staff members: you can assign as many staff members to an appointment as you require.
Neither locations nor staff members can be double booked for appointments.
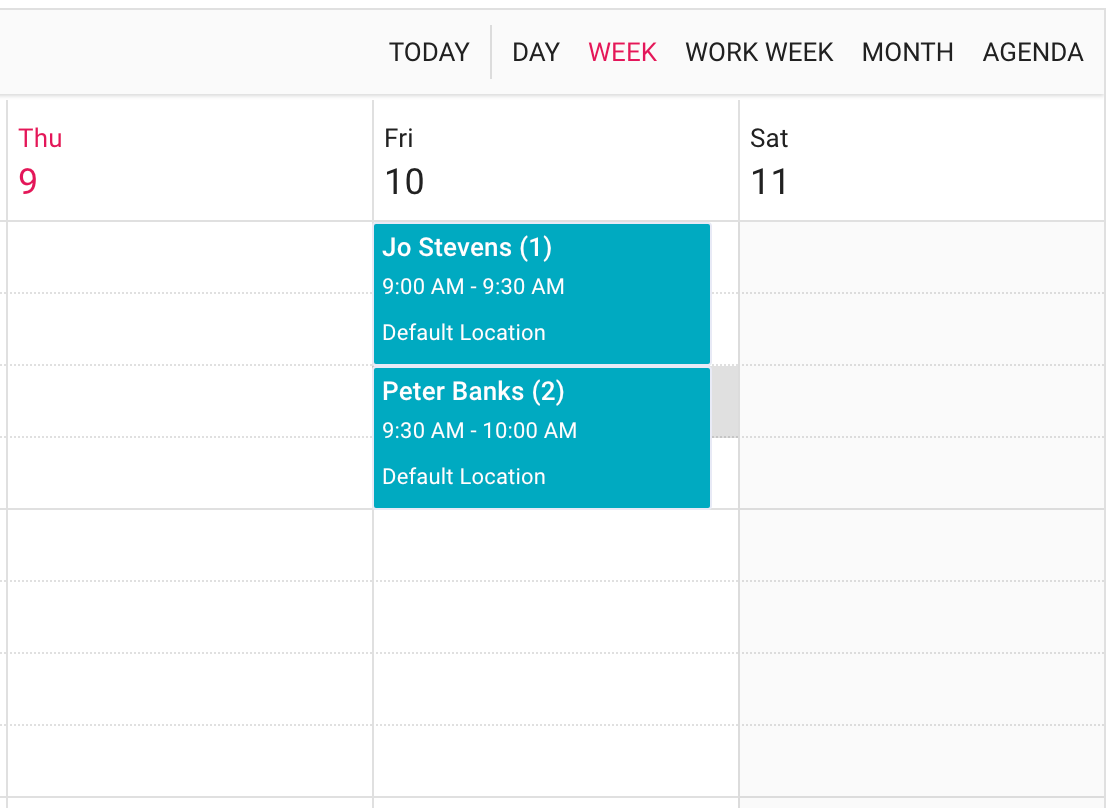
Created appointments can be seen on the calendars for both the location and the users assigned to them.