

Appearance
Taking Your First Steps
Step 1: Choose a setup path
It is straightforward to set up your own Secure Clinic system. You can either follow the instructions below or request a guided setup with one of our experts.
To get started, click here then chose whether you want to set yourself up or need help.
Step 2: Complete the setup form to start your free trial
The setup form is three pages long. We ask for information about your business, ask you to agree to our privacy policy and terms & conditions, and ask your permission to keep you updated by email as we improve our software.
We then ask you to provide either your card details or a bank direct debit. Your card is not charged until after your trial ends, and you can cancel at any time.
Finally, you tell us what to call your new website and admin user:
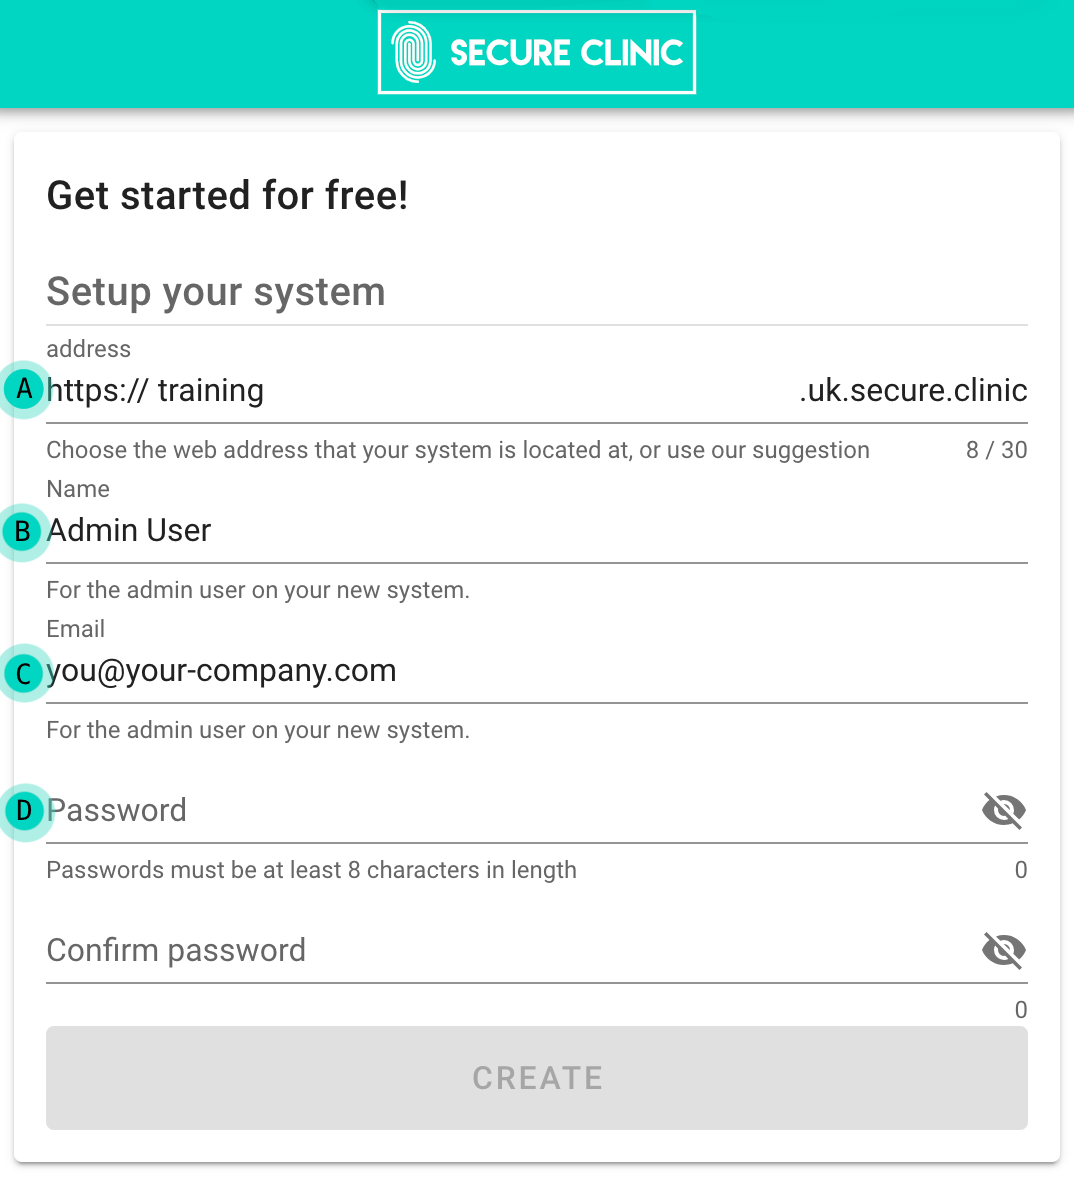
- Pick the web address for your new system. Make sure it is memorable.
- The full name of your admin 'super user'.
- An email address that you will use to log in.
- Pick a strong password for your account.
The name, email and password you choose in this step are what you will use to log in to the system. This user will have full permissions on your cloud. You can add other users later on.
TIP
Pick a strong password to protect your system. You must not use this password for anything else. We encourage the use of trusted password manager apps!
Step 3: Create your system
Click the create button to prepare your electronic health record (EHR) system. This can take a couple of minutes. Once it is complete, we will send you an email confirming your new web address. You can then continue with the getting started tutorial to find out how to set up your new system.