

Appearance
Tasks
What are tasks?
Tasks allow you to keep a record of actions that need to be taken for your patients. A centralised to-do list is automatically created for all your tasks. Examples might include arranging follow-up appointments, checking for test results, or reminders to write a report.
Creating a task
Tasks are associated with an individual patient. To create a task, find their record and click the Notes tab. Click Create at the bottom right of the screen. The task creation form loads, where you need to provide the following information:
- Task description: describe what needs to happen, for example "Call patient to rearrange appointment".
- Assign to: each task must be assigned to a user on your system. This might be yourself or another member of your team.
- Due by: optionally provide a date by which the task should be completed.
Viewing lists of tasks
There are several ways to view tasks depending on your needs:
- View all tasks. To view all tasks in the system, click All Tasks in the Tasks section of the menu. Completed tasks are not visible in this view.
- View tasks assigned to or created by your account. To filter to only the tasks assigned to your account, or tasks you created and assigned to other users, click Assigned To Me under Tasks in the main menu. The number of tasks allocated to your account is shown in the menu. The circle around the number is yellow if any task is due within the next 7 days, and red if any task is overdue. This view does not show completed tasks by default, but you can show them by toggling the switch at the bottom of each list. Tasks may spread over multiple pages.
- View tasks for a single patient. To view tasks for a patient, open their patient record and click Tasks. This view does not show completed tasks by default, but you can show them by toggling the switch at the bottom of each list. Tasks may spread over multiple pages.
Interacting with task lists
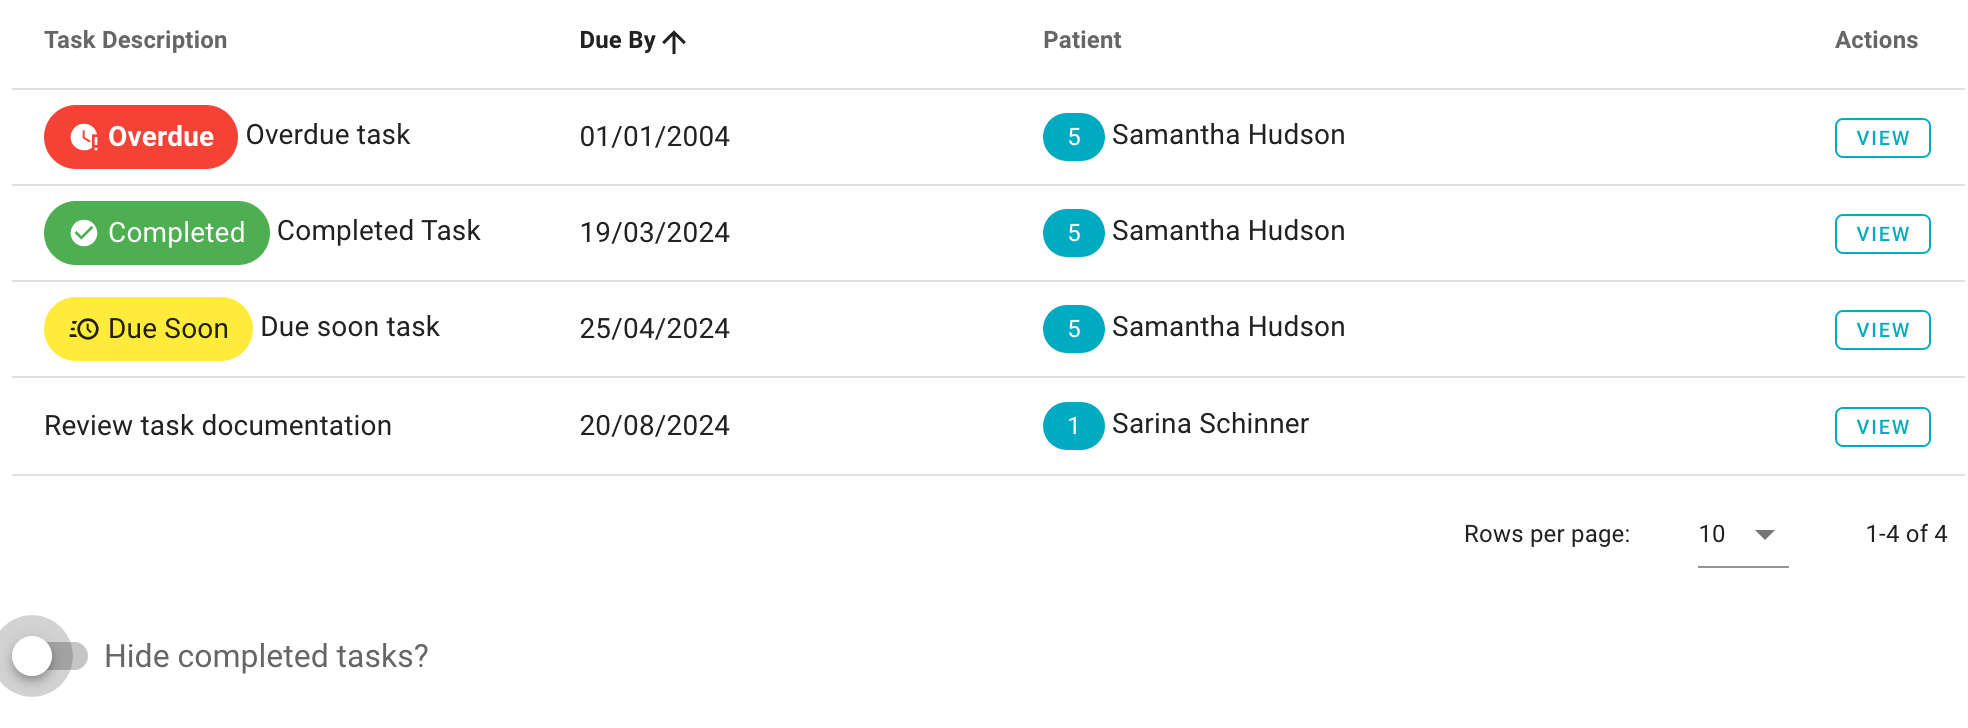
Example of a task list for a user.
By default, tasks are sorted by due date, with the soonest first. Tasks are highlighted if they are overdue or due within the next 7 days. You can change the sort order by clicking any column header.
To show or hide completed tasks, click the toggle at the bottom of the list. At the bottom of every task list you can also set how many tasks to show per page and navigate between pages.
Click View next to any task to view details and provide updates — see the next section.
Viewing and updating tasks
You can mark tasks as in progress or completed. You can also mark them as on hold, which stops the task from being highlighted as due soon or overdue. To do this, find a task using the methods above and click View. The task details screen loads with information about the task. At the bottom of the information section are buttons to change the status of the task.
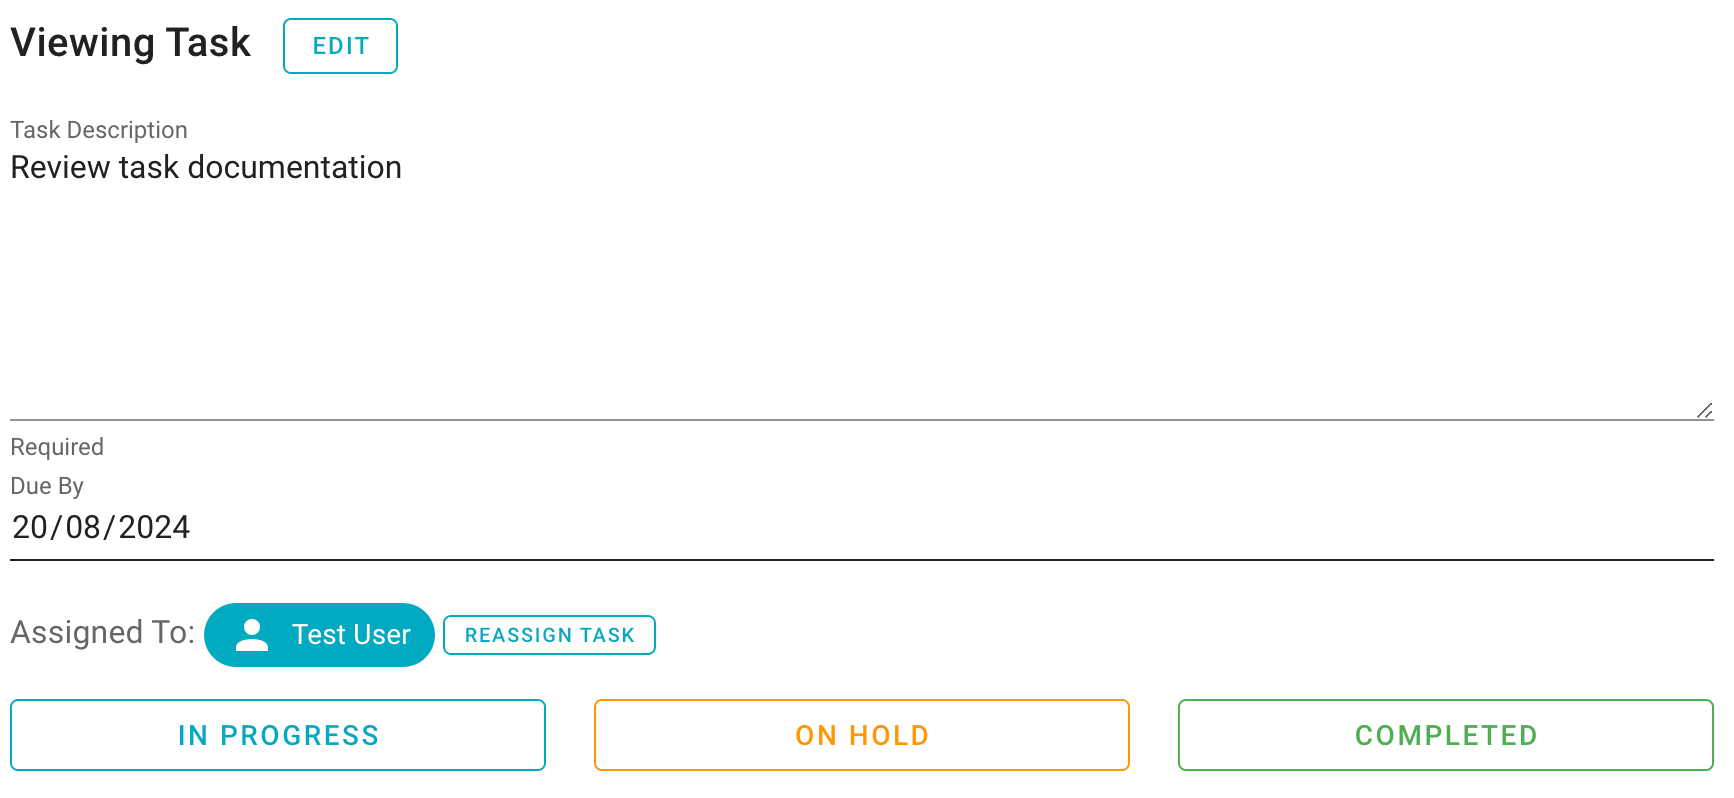
Clicking the buttons at the bottom of the task details allows you to change the status of the task.
To edit the due date or description of a task, click Edit at the top of the details page. This unlocks the text boxes for you to make your changes, which you then save or cancel using the buttons that appear. To reassign a task to a different user, press the reassign task button and choose a new user. You need to confirm your changes for them to take effect.
Any changes to the task are shown in the history section below the task details, allowing you to review the progress made by your team.
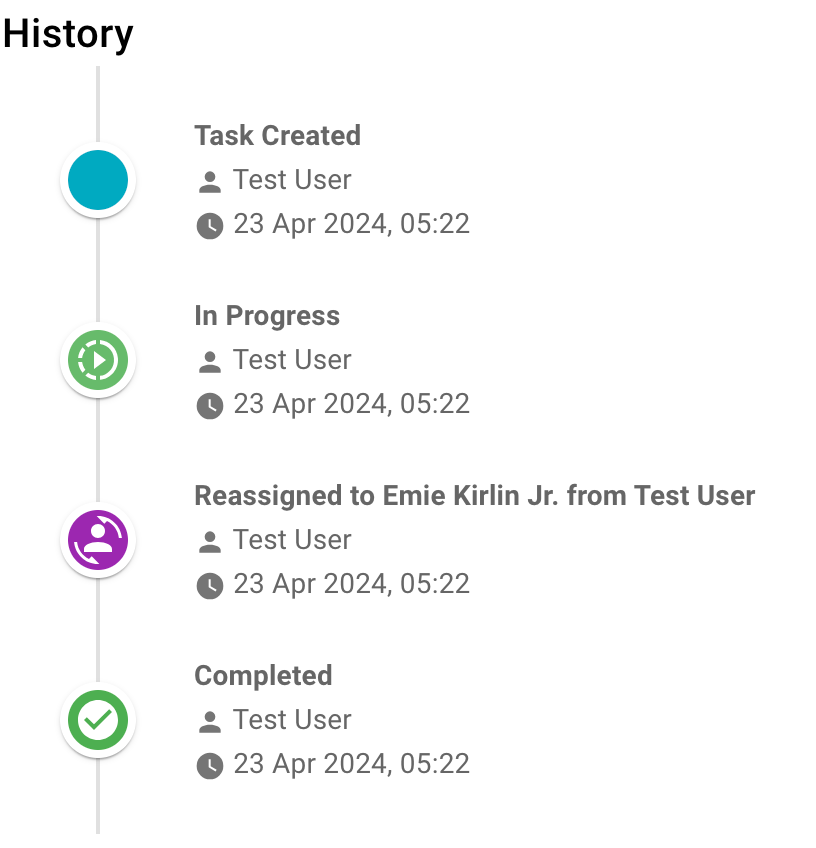
An example of the history created by changes to any task.