

Appearance
Creating Your First Patient
Creating a patient
To create a new patient, click Create New in the Patients section of the menu.
Fill in the form with details of your test patient. First name, last name, and date of birth are required; everything else is optional. Once you click create, your patient will be saved and allocated an ID number. If you have already set up custom fields, the page will refresh and allow you to enter that data:
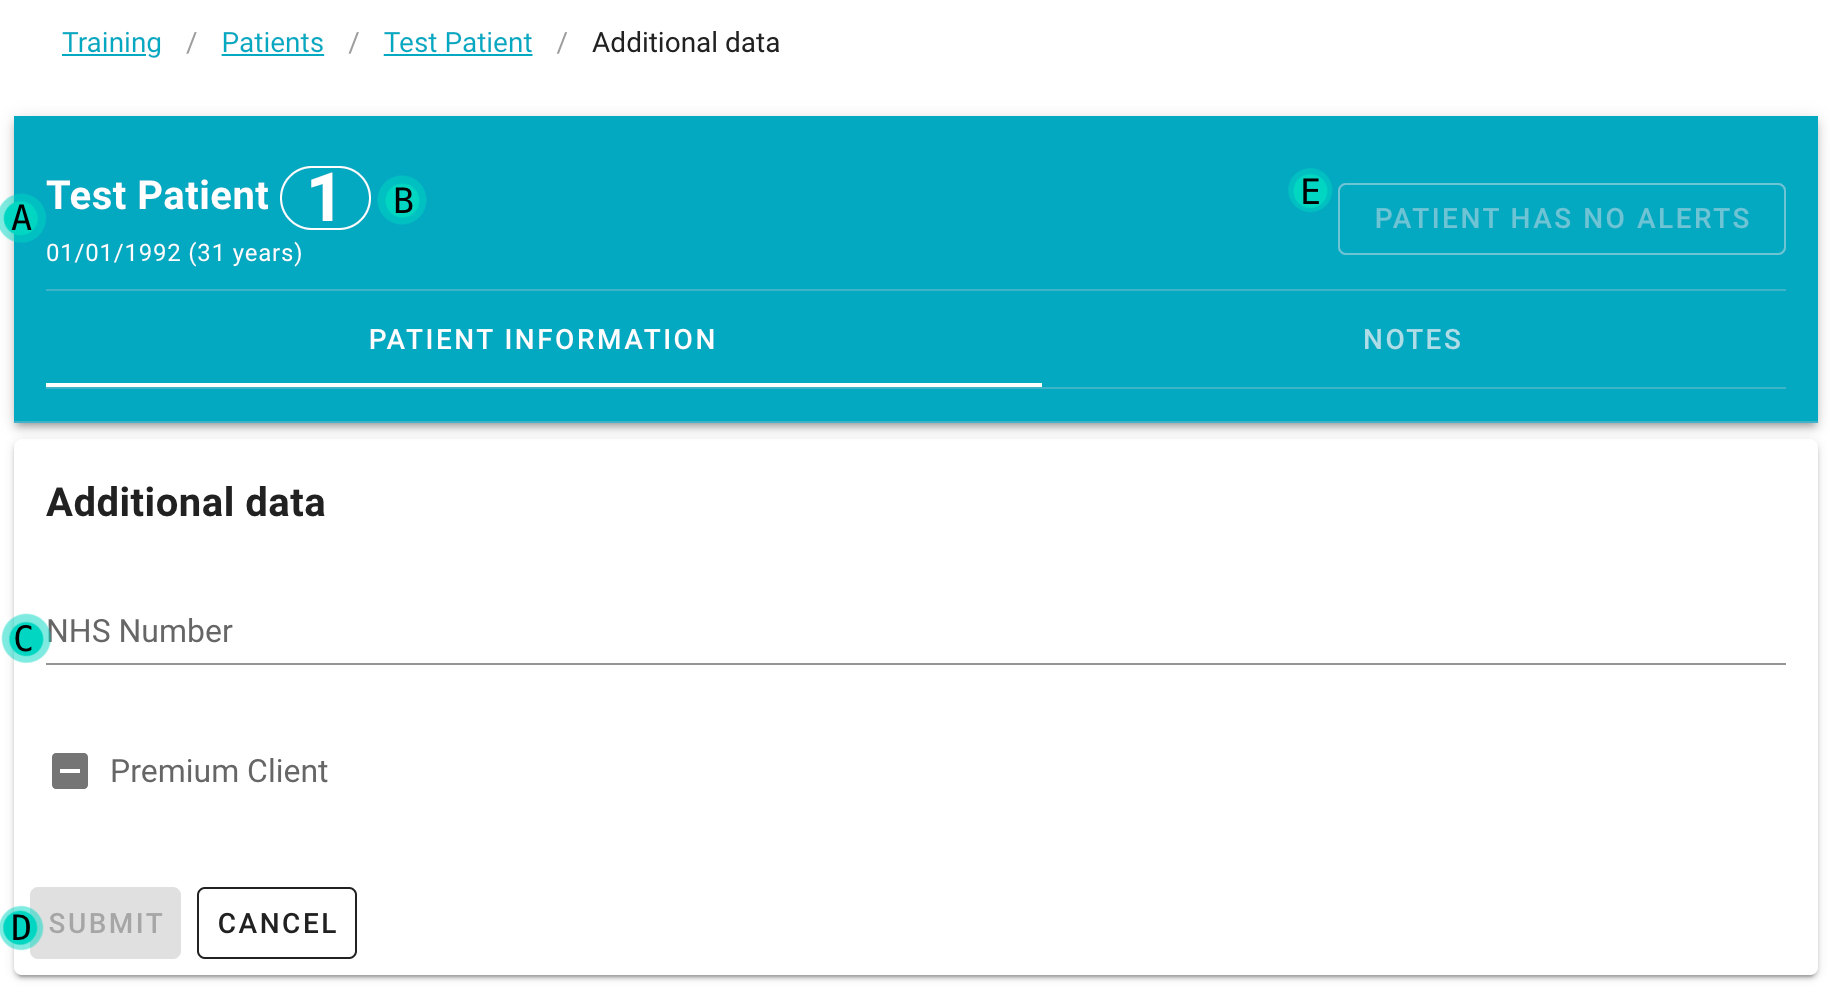
- The patient identifier banner is shown at the top of any page relating to a specific patient.
- Their unique patient ID number is included on the banner.
- The custom data fields we created in the previous article can now be filled in.
- The submit button is disabled here as the 'premium client' field is required but not filled in.
- The patient has no saved alerts yet — see below.
Viewing the new patient
After submitting the custom data, the page reloads showing the stored data for this patient. Click any section to view or edit the data saved about a patient. All changes to saved data are automatically recorded and attributed to the staff member who made them. Throughout the software, click History or the history icon to view this audit trail.
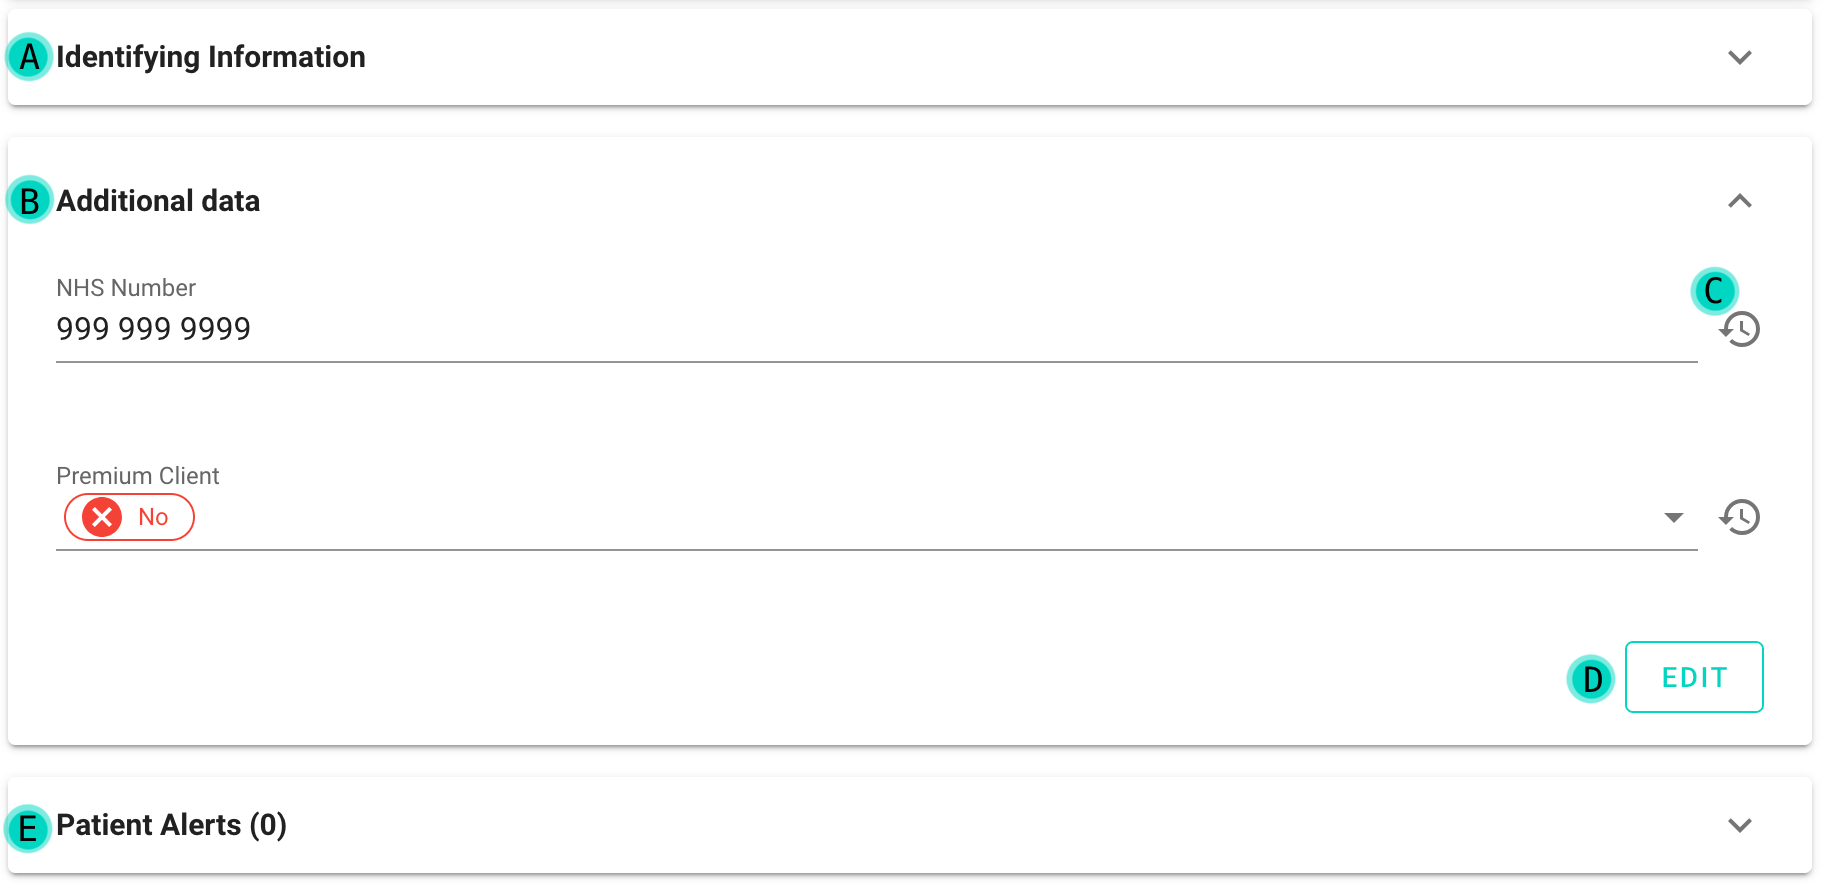
- Click this tab to open the core data about a patient.
- The expanded additional data tab shows you your custom fields.
- The history button allows you to view the audit trail of changes for a field.
- The edit button allows you to make changes to the patient record.
- The Patient Alerts section lets you store important warnings about a patient, which are visible in their identity banner on every page.
Adding an alert to a patient
If a patient needs important warnings placed on their file — for example allergy status — use a Patient Alert. To add one, click Patient Alerts, then Manage Patient Alerts, then Create. Once you have written and saved your alert, the alerts button in the patient banner turns red. Click this button to view the alert.
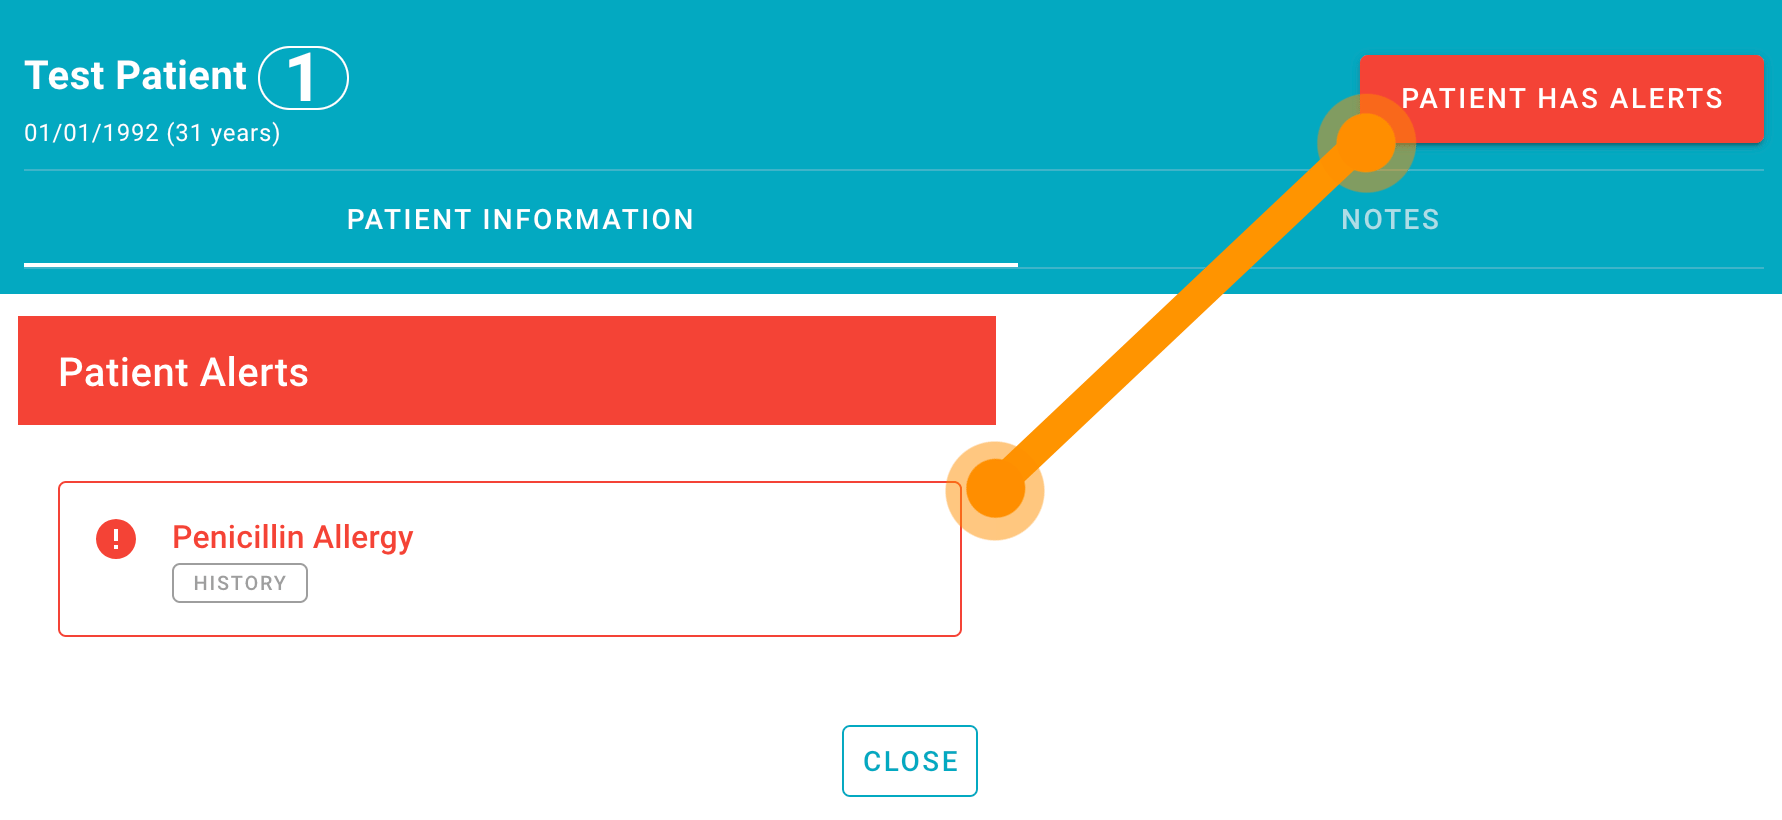
Clicking the highlighted "patient has alerts" button in the patient banner expands the alert so you can view its content.
The banner also shows a warning if this patient shares their name with someone else on your system, helping your team avoid mixing up similarly-named records — see Similar Name Warnings.
Watching for similar patient names
If another patient on your system has the same or a very similar name, a warning icon appears next to the patient's name in the banner. Click it to review the matching patients and confirm you have the right record. See Similar Name Warnings for more.
Creating an entry for a patient
To switch from viewing patient information to viewing and creating notes, click Notes in the patient banner. Click Compose a new entry to start a new text entry:
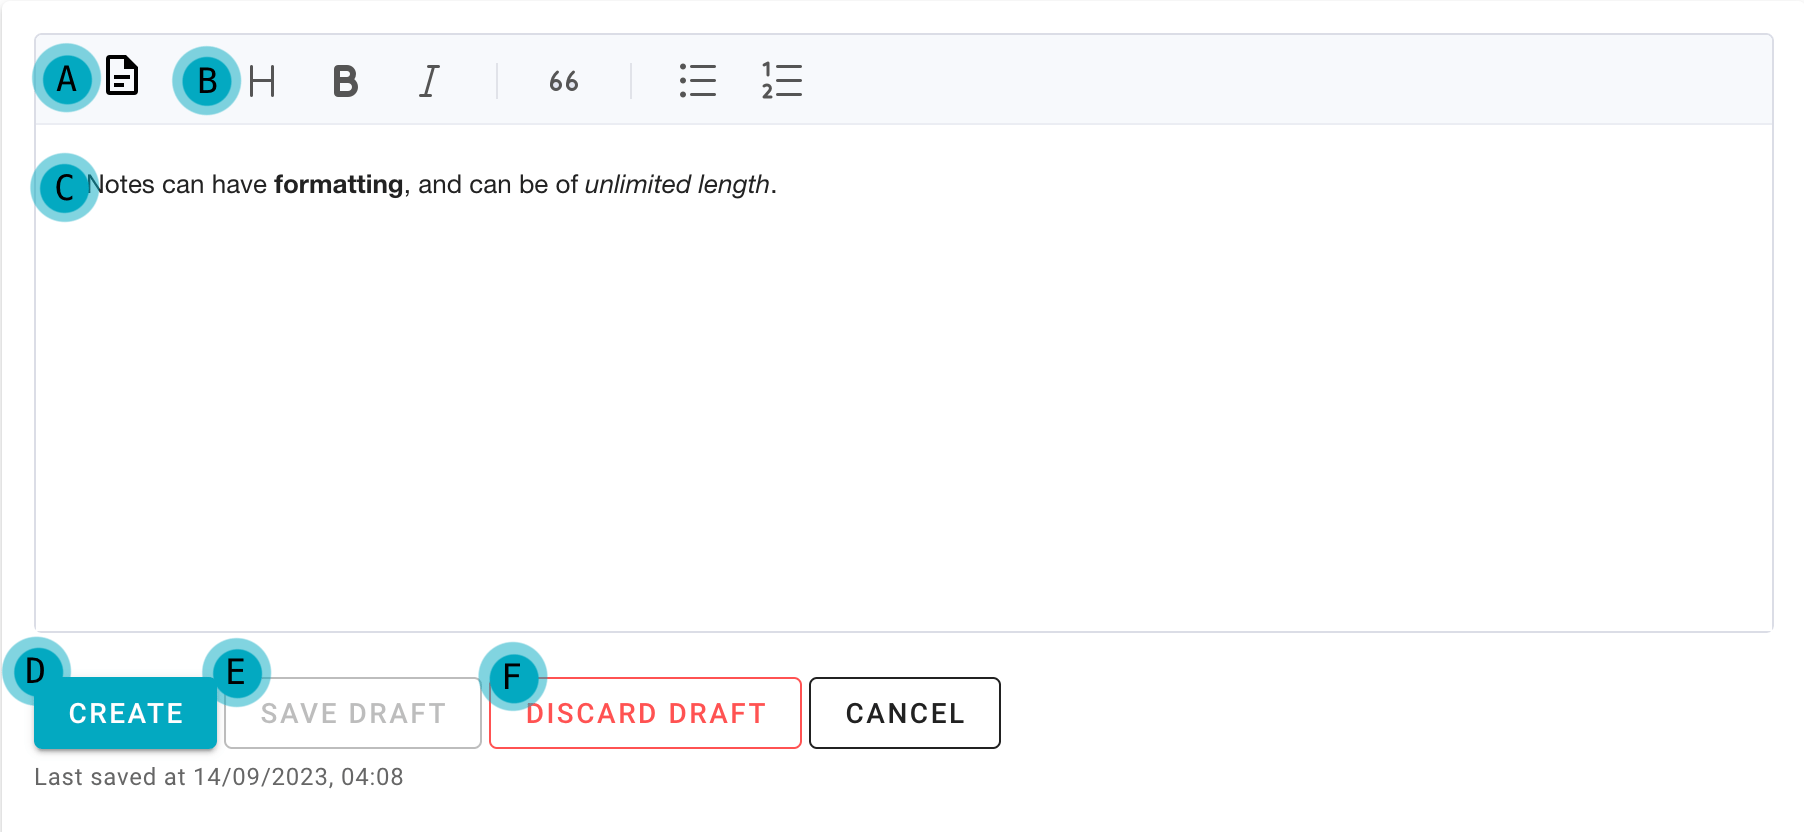
- The template button lets your staff members or entire organisation save reusable text templates.
- Text entries can have full formatting using the buttons above the textbox.
- The box where your text entries are written.
- The create button saves the entry into the patient's journal.
- The save draft button manually saves a draft (see below).
- This button discards any saved drafts, losing the data.
You can use full text formatting when creating your entry using the toolbar buttons. Templates can be created and shared amongst your team to reduce repetition for commonly written entries. Drafts are automatically saved every few minutes to reduce the risk of data loss. Drafts are only visible to the user who wrote them, and there can only be one per patient. When the user returns to the entry box, their saved draft will be waiting for them.
Jumping to an entry
If a patient has a large number of entries in their journal, use the timeline feature to skip to the time you want to view. Open the timeline by pressing the calendar icon.
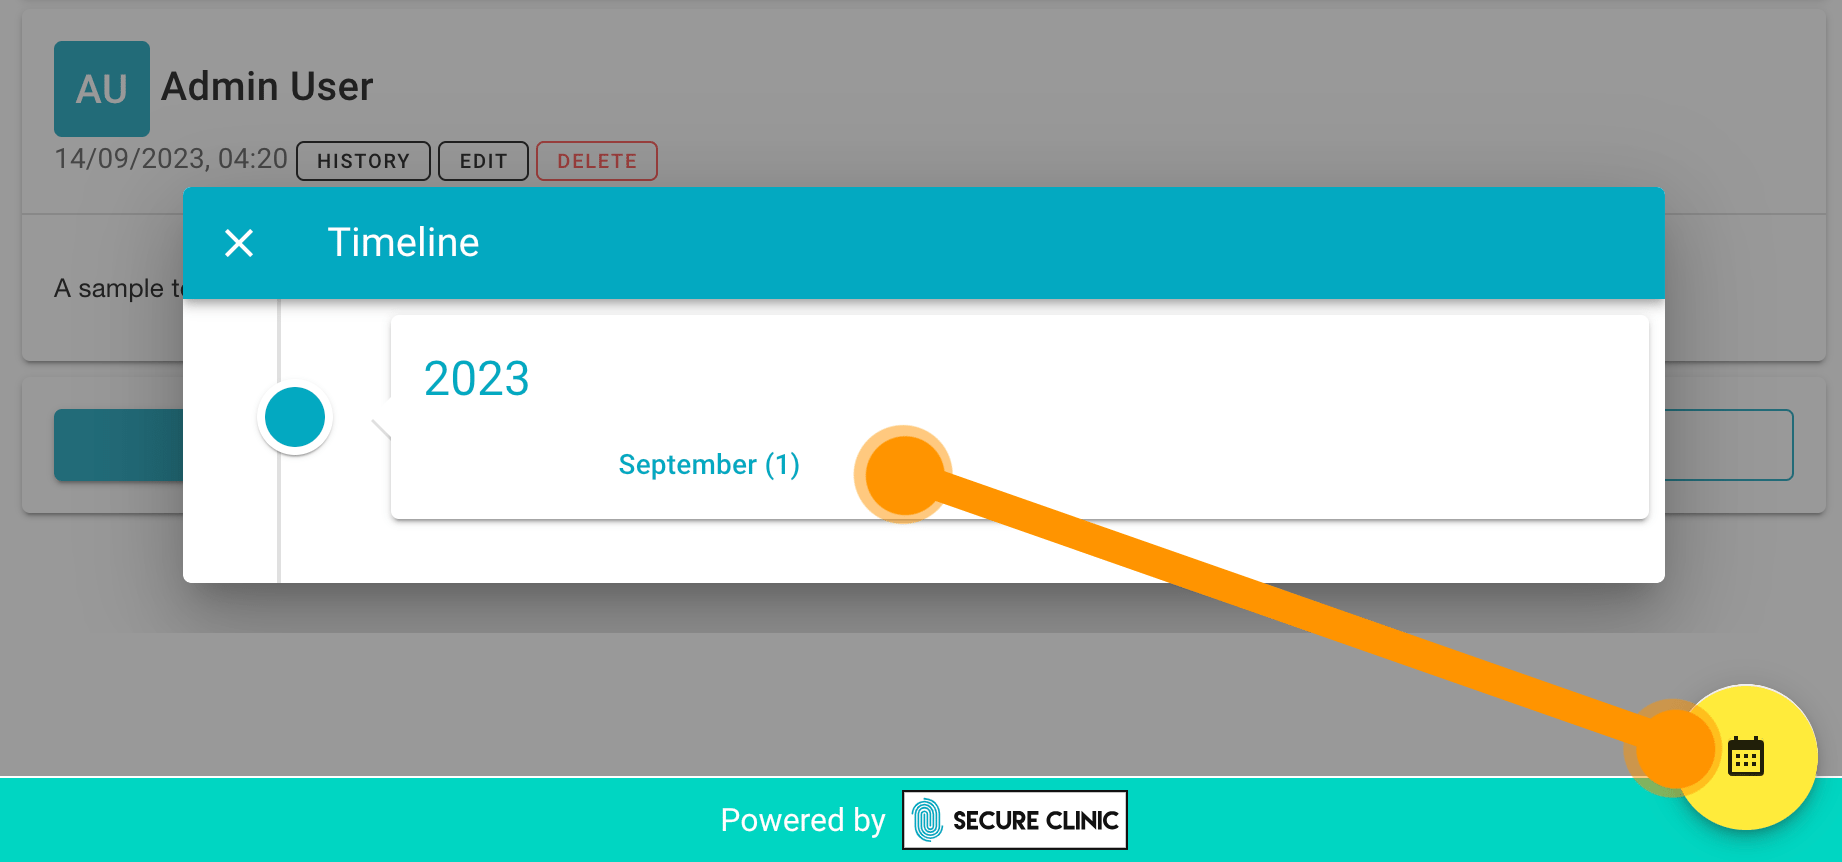
Clicking the yellow timeline button opens a window that allows you to jump back in time within a patient's journal.
Next: Invite a team member